Managing samples
Importing samples
Importing CBC samples from a file
Preparing for import
Run the Vision software. For CBC samples, you need to disable the "Extended RBC" mode before importing.
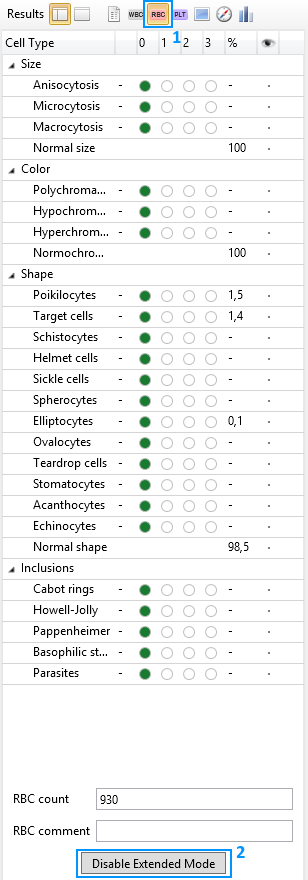
To do so, select the required sample in the Vision software, open the "RBC" tab (1) and click the "Disable Extended Mode" button (2).
Export the sample into a file with ".visiondb" extension using the Vision software context menu. To export multiple samples (no more than five at a time), select the required samples by holding down the "Ctrl" key and clicking the left mouse button on the samples.
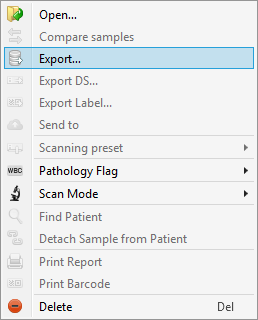
Then right-click on the selected sample(s) and choose "Export" in the context menu.
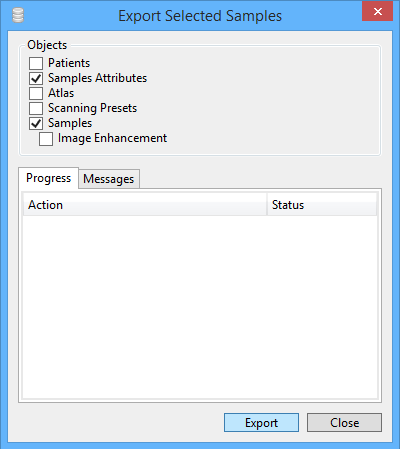
In the export window, check the "Sample attributes" and "Samples" boxes, then click "Export". Enter the file name and select a directory in the opened dialog box, then click "Save". Now the sample is saved and can be imported to the Vision Expertise online service.
Importing
Click "Samples" in the menu on the left. You will be taken to the "Sample manager" page containing the "Import CBC/BM" and "Import from URL" buttons as well as the table of samples.

Click "Import CBC/BM".

Click "Browse" and select the required file with “.visiondb” extension, then click "Open".
Attention
The imported file must not contain more than five analyses, and its size must not exceed 30 MB. CBC samples with the "Extended RBC" mode are not supported.
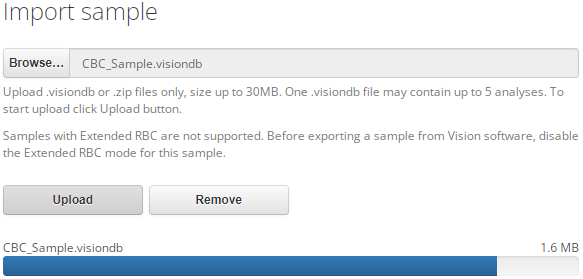
After that, the file name will appear in the "Browse" field, as well as above the loading bar. To delete the selected file, click "Remove". To start uploading, click "Upload". The file upload will begin, its size and the upload progress will be indicated on the loading bar. After a successful file upload, the loading bar will be full and the full file size will be displayed.

Upon successful import of the sample, a corresponding notification will appear.

If a sample with Extended RBC is selected for import, you will be notified that there is no support for this type of samples.

If a sample with a lack of objects is selected for import, a corresponding notification will appear.
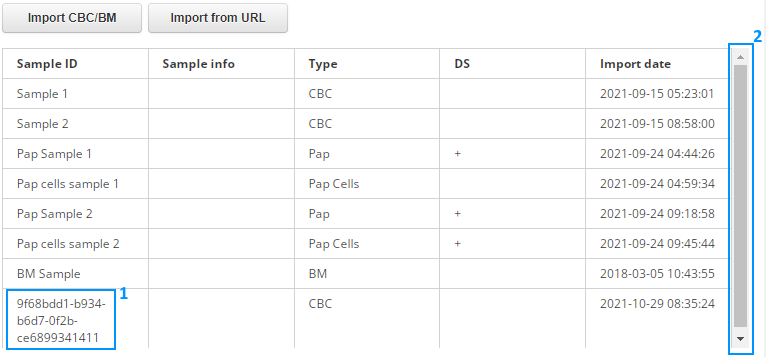
In the sample table, a new sample with the GUID (1) of the uploaded sample will appear in the last row. To view the entire list of samples, use the scroll bar (2) or the mouse wheel.
Importing samples using URL
Preparing for import
Import samples using the Pathoview service in two steps:
- Uploading a digital slide to “Pathoview”;
- Importing a sample (digital slide) from Pathoview to Vision Expertise.
For more details about working with the "Pathoview" service, see the "Working in "Pathoview" online service" section.
Importing
Click "Samples" in the menu on the left. You will be taken to the "Sample manager" page containing the "Import CBC/BM" and "Import from URL" buttons as well as the table of samples.
Click "Import from URL".
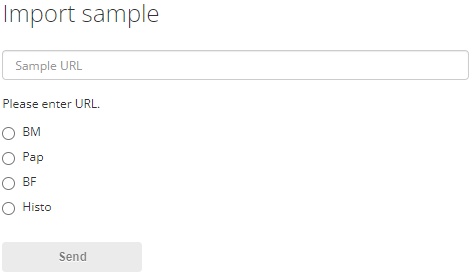
Enter the web address of the sample in the “Sample URL" text field. To do this, log in to Pathoview under your account and open the sample you want to import, then copy the contents of the address bar to the clipboard. For samples containing digital slides, you must also enable sharing via a special link by clicking the “Share" button. Paste the clipboard contents into the "Sample URL" field.
Attention
Do not use shared links for import, instead use a regular link to the sample in the following format: https://pathoview.com/samples/[sample number].
Select the type of the imported sample and click the "Send" button, wait for the import to finish. Note that the Pathoview sample must have a supported type corresponding to the one selected by you. The table matching types is given below:
| Expertise sample type | Pathoview sample type |
|---|---|
| BM | BM |
| Pap | Pap or DS |
| Pap ICC | Pap ICC or DS |
| BF | BF |
| Histo | Histo or DS |
| Cyto | Cyto or DS |
| STDs | STDs or DS |
| Microbiology | Gram |
Upon successful import of the sample, a corresponding notification will appear.
Editing general sample information
To edit and view general information about the sample, click on the name of the sample.
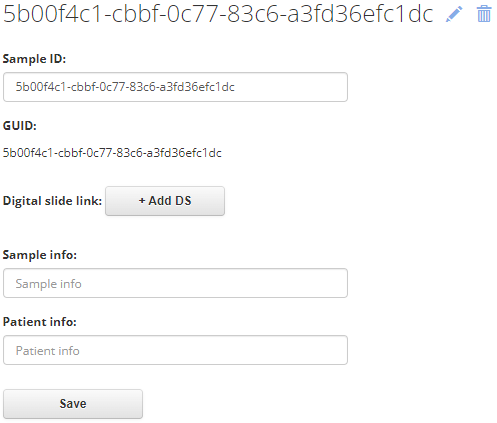
Enter the data in the “Sample ID" field, add links to digital slides if necessary, fill in the “Sample information” and “Patient information" fields. Click "Save". To get links to digital slides, use the Pathoview online service.

If the editing is successful, an update notification will appear.
To delete the sample, click on the trash can icon and confirm the deletion in the pop-up window.
Sample Validation
To validate a sample, click on the pencil icon to the right of the sample name when editing its general information. You will be taken to a page containing the name of the sample, the panel for switching the tabs of the sample, and the contents of the selected tab. To switch between the sample tabs, use the "Save and continue" button or the tab switching panel, in both cases the changes will be saved.
If a link to a digital slide was added when editing the general sample information, the page will contain an additional tab called "Digital slide". The "Summary" tab will contain an image of the digital slide and the "Open the digital slide" link. To view the digital slide, click on either of these items.
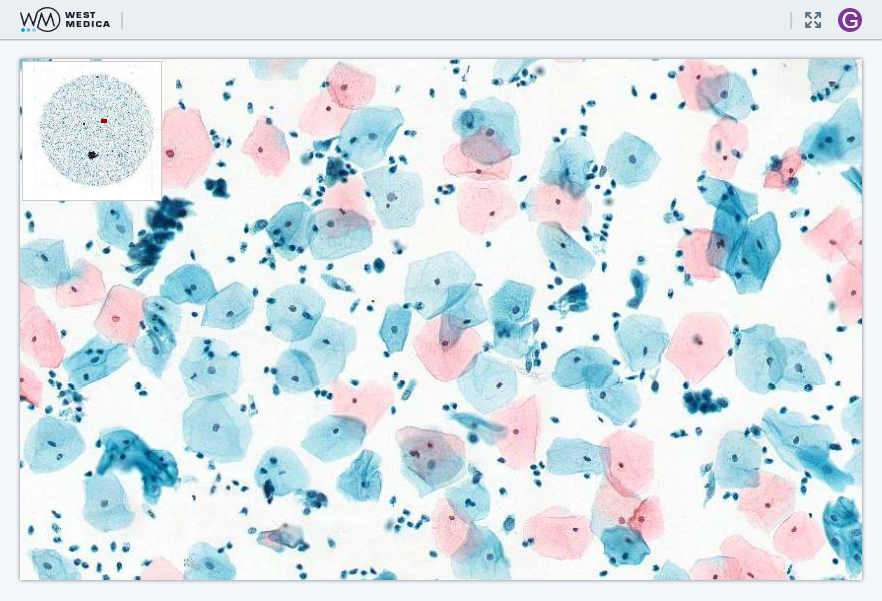
The digital slide will open in a new browser tab. Move around it by moving the mouse while holding the left mouse button. To change the zoom, use the mouse wheel.
CBC sample validation
"WBC" tab
This tab allows you to view and change cell types.
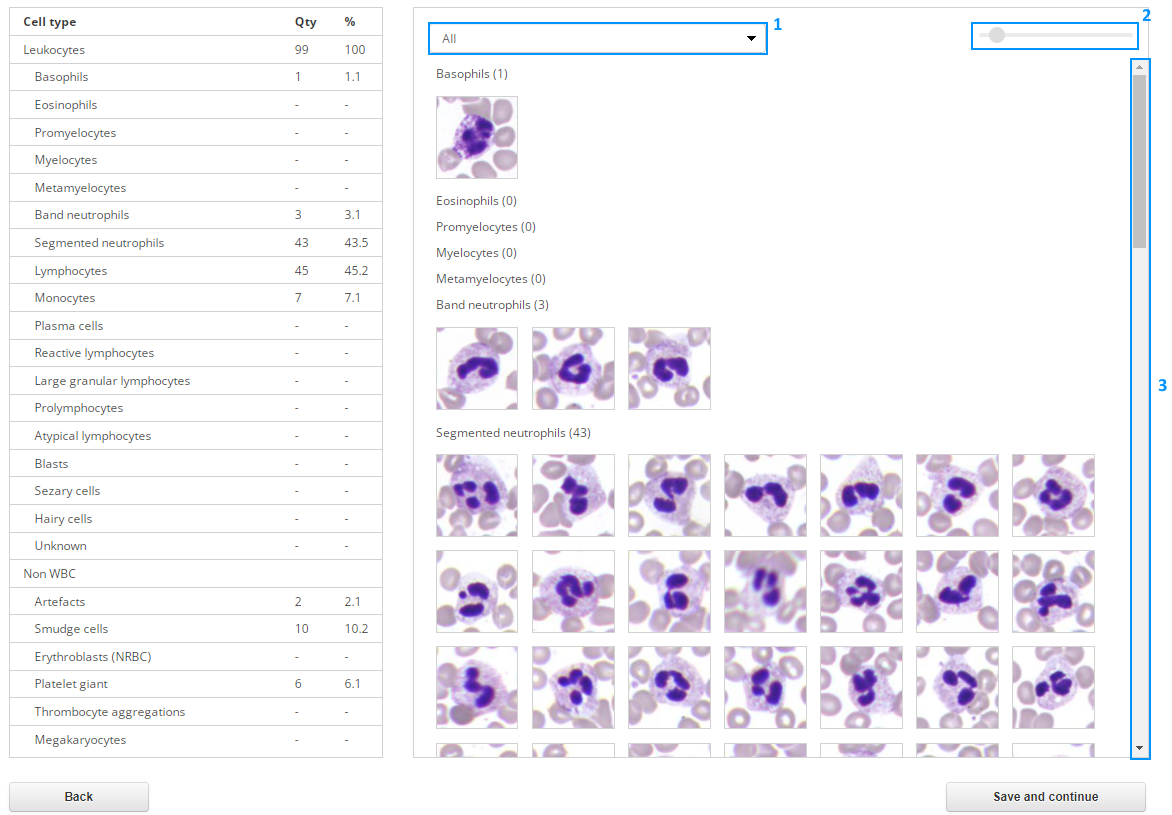
The "WBC" tab consists of two sections:
- Table of cell types;
- Gallery of cell images.
Initially all cells are displayed as unknown. You can select the type of cells to view in the drop-down list at the top of the gallery (1). In the upper right corner there is a tool for changing the zoom of cell images (2). Use the scroll bar (3) to view all the cells.

Left-click on a cell and press the "Space bar" on the keyboard to see a quick preview. To close the quick preview, press the "Space bar" again or click on the cross in the upper right corner of the pop-up window.
To delete a sample, left-click on it and press "Delete" on the keyboard.
Ways to work with the gallery:
Moving cells from the gallery to the table of types
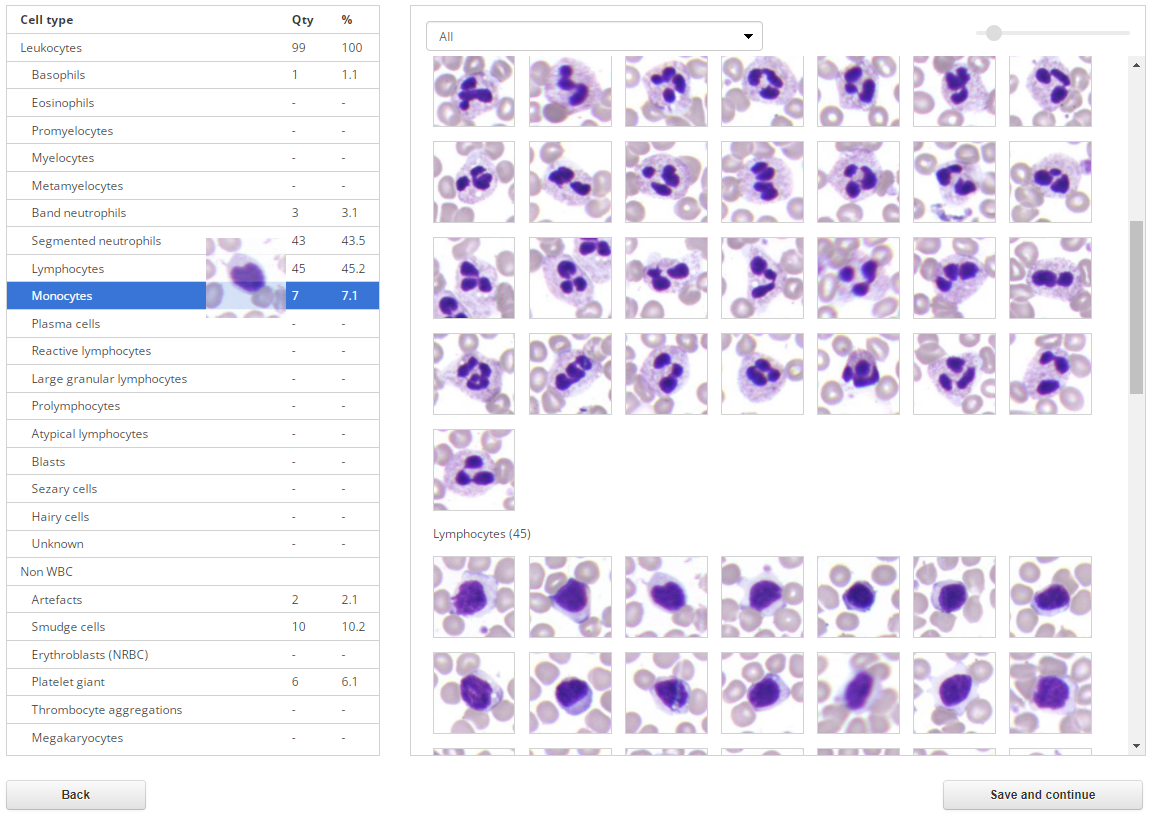
To move a single cell, hold down the left mouse button on the desired image and drag the cell to the table row with the name of the desired type (the background of the row will turn blue), then release the left mouse button. The number of cells of the selected type in the table will change.
To move multiple cells, left-click on each cell image, they will be highlighted with blue frames. To select all the cells in a group, click on its name. When the desired cells are selected, hold down the left mouse button on one of them and drag the cell to the table row with the name of the desired type (the background of the row will turn blue), then release the left mouse button.
Moving cells in the list with images
Select "All" in the drop-down list. All cell groups will be simultaneously displayed in the gallery. The number of cells of each type is indicated in brackets.
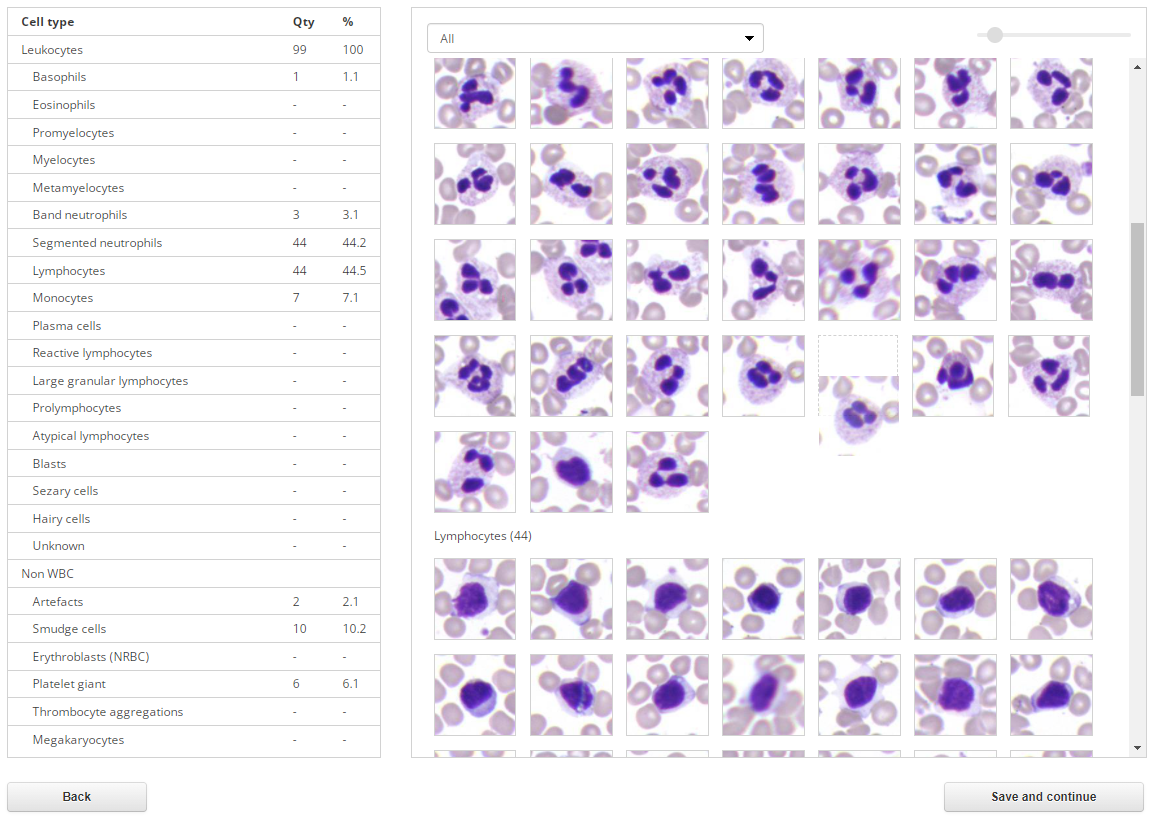
Select one or more cells. To select all the cells in a group, click on its name. Place the cursor on one of the selected cells. Hold down the left mouse button and drag the image of the cell up or down the gallery to transfer all the selected cells to another group. The placement field with a dotted border will indicate the place the selected cells will move to. If there are other cells in the group, then drag the cell/group of cells onto them until a placement field is displayed. Then release the left mouse button.
Selecting a cell type via the context menu
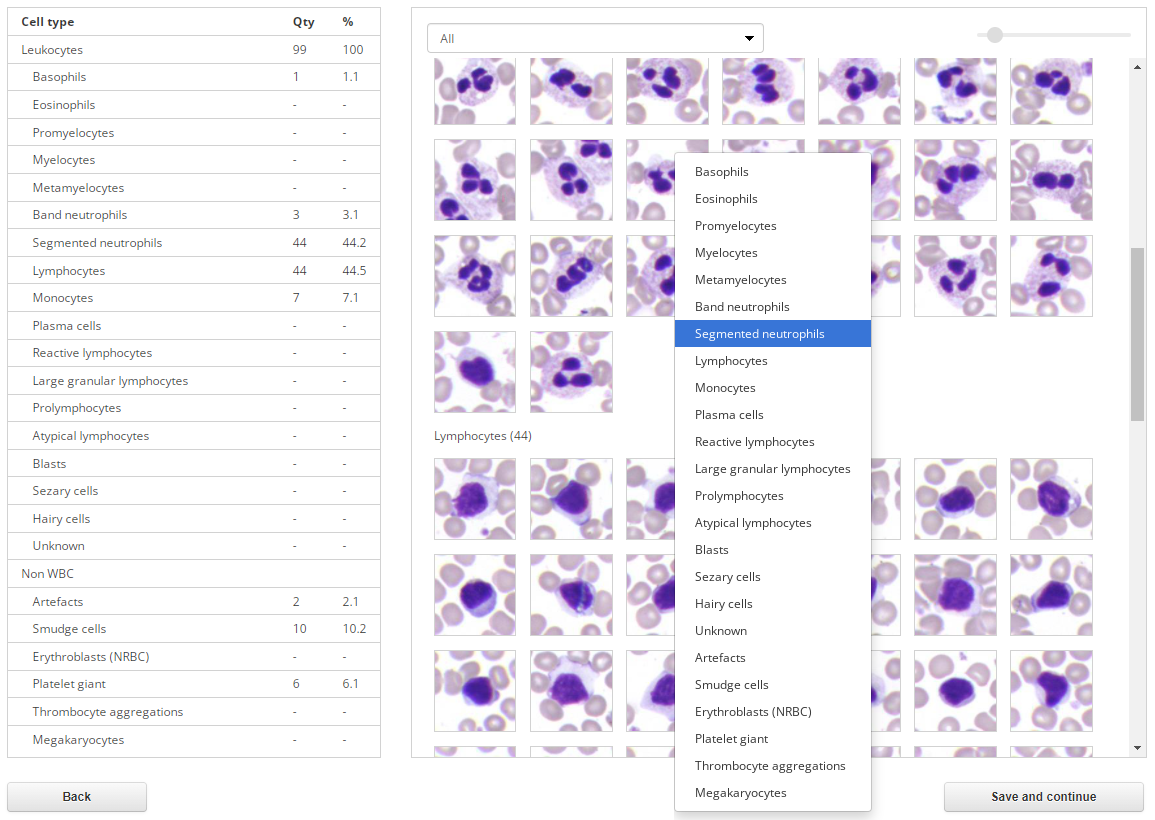
In addition to moving the image of the cell, you can select its type in the context menu. Right-click on the selected cell to summon its context menu, then select the desired type in it with the left mouse button.
To select a type for multiple cells, left-click on each cell image, they will be highlighted with blue frames. Then right-click on one of the selected cells to summon the context menu, and select the desired type in it using the left mouse button. To select all the cells in a group, click on its name.

Once finished with all the cells, click "Save and continue" in the lower right part of the screen. After saving, you will be automatically taken to the "RBC" tab.
"RBC" tab
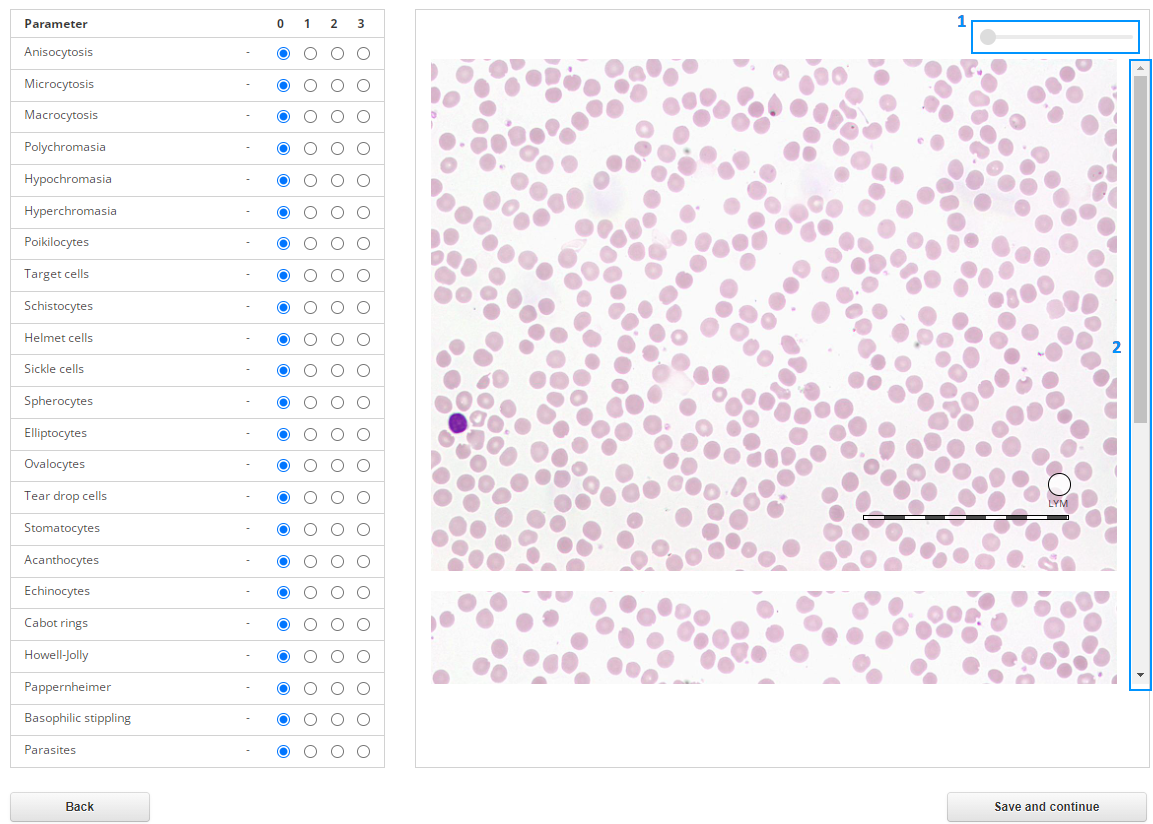
The "RBC" tab consists of two sections:
- Table of RBC parameters;
- Sample image.
Just like on the "WBC" tab, on the "RBC" tab there is a tool for zooming the sample image (1), and the scroll bar (2) for viewing the enlarged sample image.
To evaluate the morphology of red blood cells by their size in the image, use the "Ruler" and "Small lymphocyte" tools. Set the required parameter values in the table using the radio buttons in the corresponding columns. Then click "Save and continue" to save the results and switch to the "Summary" tab
"Summary" tab

If necessary, add details to the summary in the “Description” field and fill in the "Sample Information" and "Patient Information" fields. To save the entered information, click "Save and close". To go to the "RBC" tab, click "Back".
CBC data and the image of the smear end are also displayed if available. You can view the "End of smear" using the scroll bar or the mouse wheel.
The editing of the sample is complete, and the sample is ready to be included in a test.
BM sample validation
"Cells" tab
This tab allows you to view and change cell types.
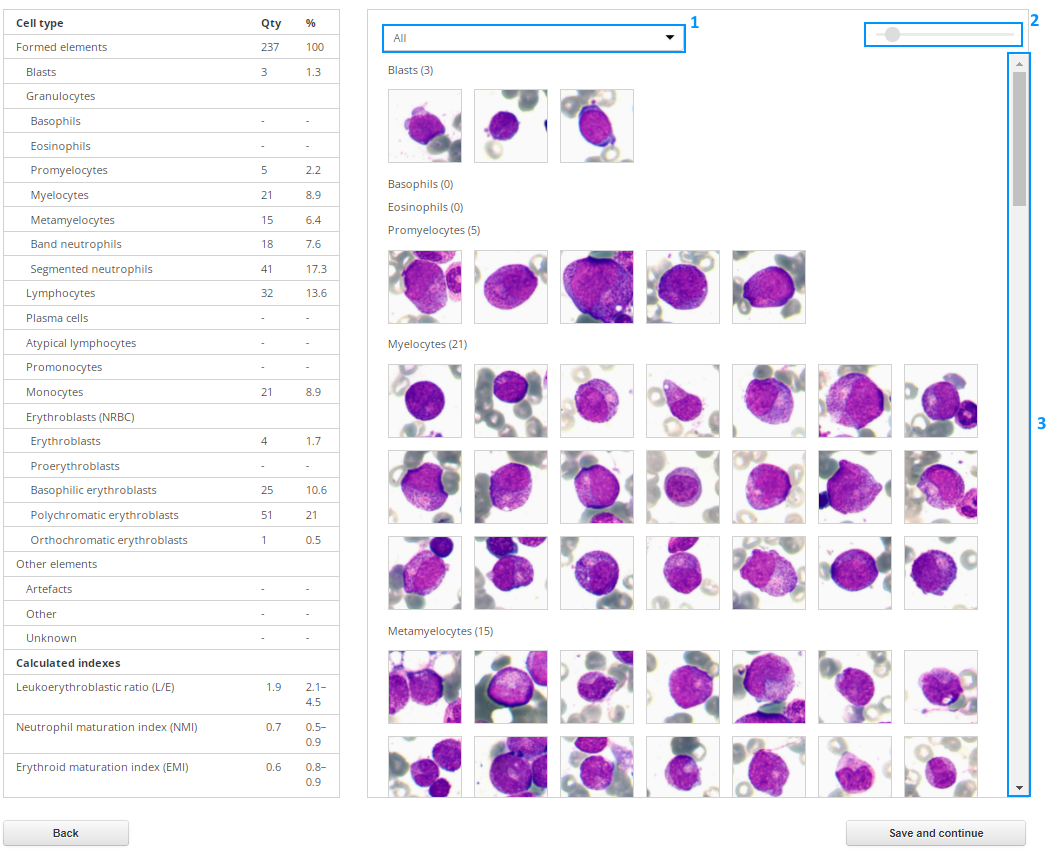
The "Cells" tab consists of two sections:
- Table of cell types;
- Gallery of cell images.
Initially all cells are displayed as unknown. You can select the type of cells to view in the drop-down list at the top of the gallery (1). In the upper right corner there is a tool for changing the zoom of cell images (2). Use the scroll bar (3) to view all the cells.
Left-click on a cell and press the "Space bar" on the keyboard to see a quick preview. To close the quick preview, press the "Space bar" again or click on the cross in the upper right corner of the pop-up window.
To delete a sample, left-click on it and press "Delete" on the keyboard.
Ways to work with the gallery:
Moving cells from the gallery to the table of types.
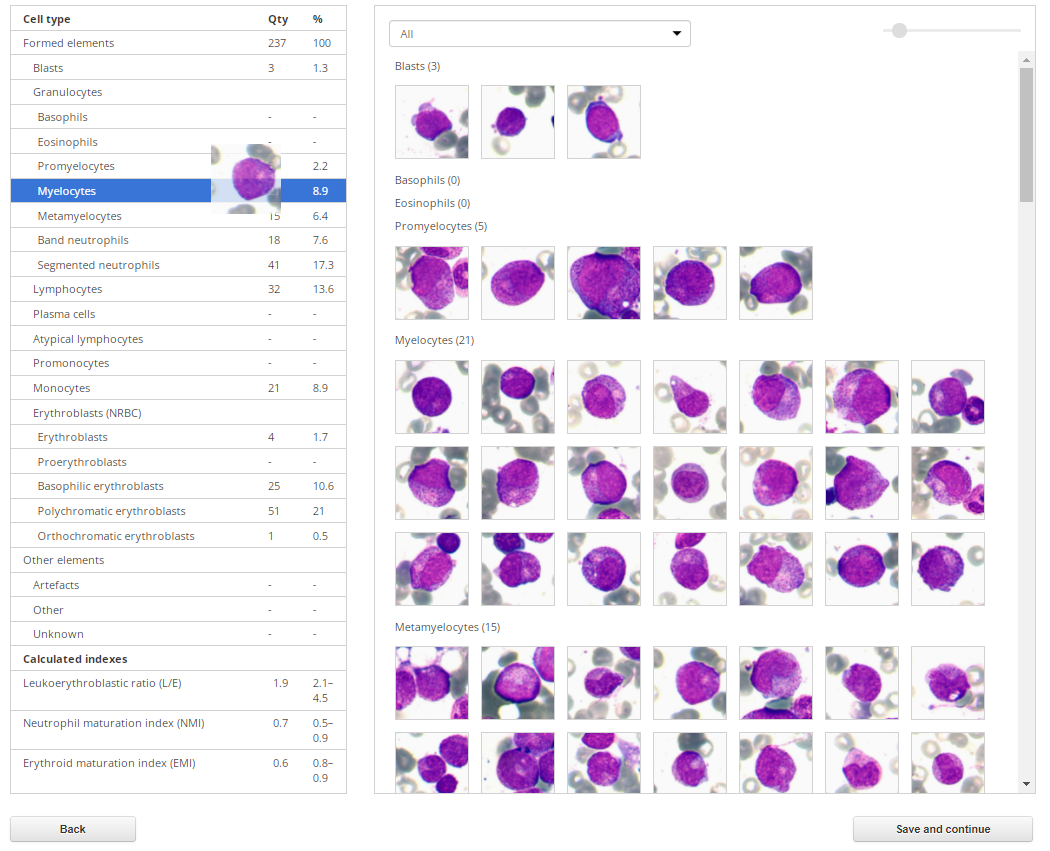
To move a single cell, hold down the left mouse button on the desired image and drag the cell to the table row with the name of the desired type (the background of the row will turn blue), then release the left mouse button. The number of cells of the selected type in the table will change.
To move multiple cells, left-click on each cell image, they will be highlighted with blue frames. To select all the cells in a group, click on its name. When the desired cells are selected, hold down the left mouse button on one of them and drag the cell to the table row with the name of the desired type (the background of the row will turn blue), then release the left mouse button.
Moving cells in the list with images
Select "All" in the drop-down list. All cell groups will be simultaneously displayed in the gallery. The number of cells of each type is indicated in brackets.
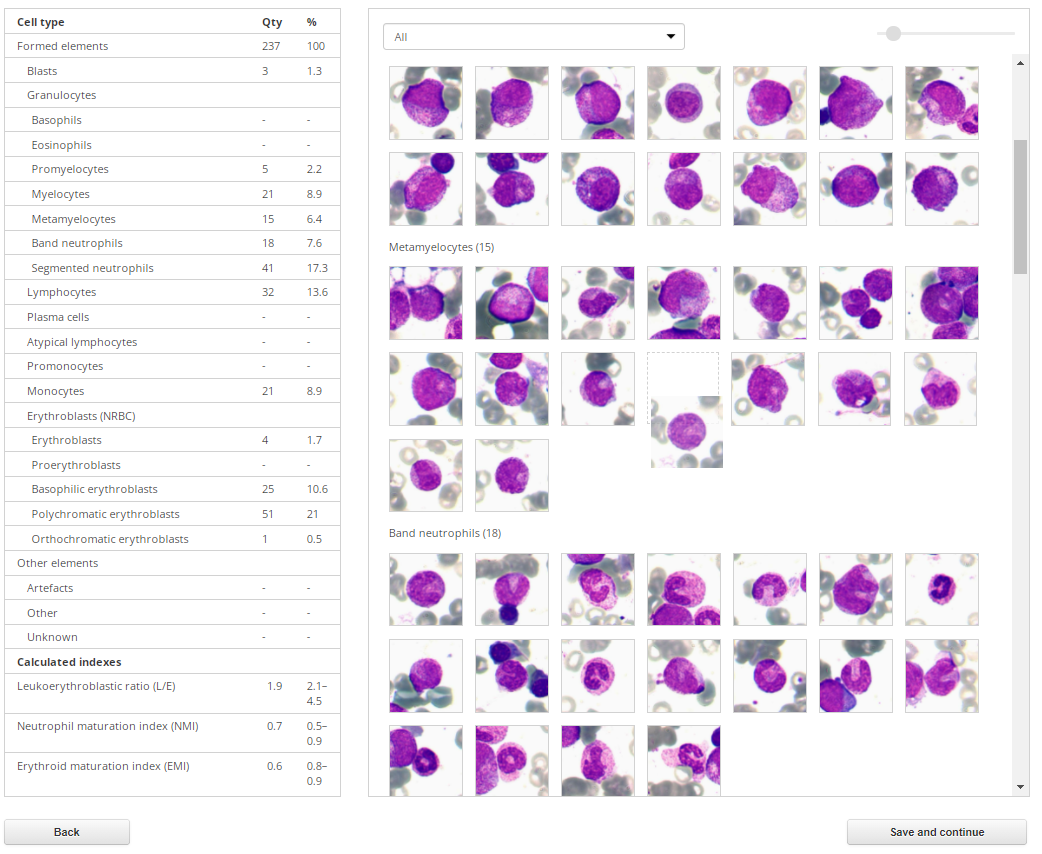
Select one or more cells. To select all the cells in a group, click on its name. Place the cursor on one of the selected cells. Hold down the left mouse button and drag the image of the cell up or down the gallery to transfer all the selected cells to another group. The placement field with a dotted border will indicate the place the selected cells will move to. If there are other cells in the group, then drag the cell/group of cells onto them until a placement field is displayed. Then release the left mouse button.
Selecting a cell type via the context menu
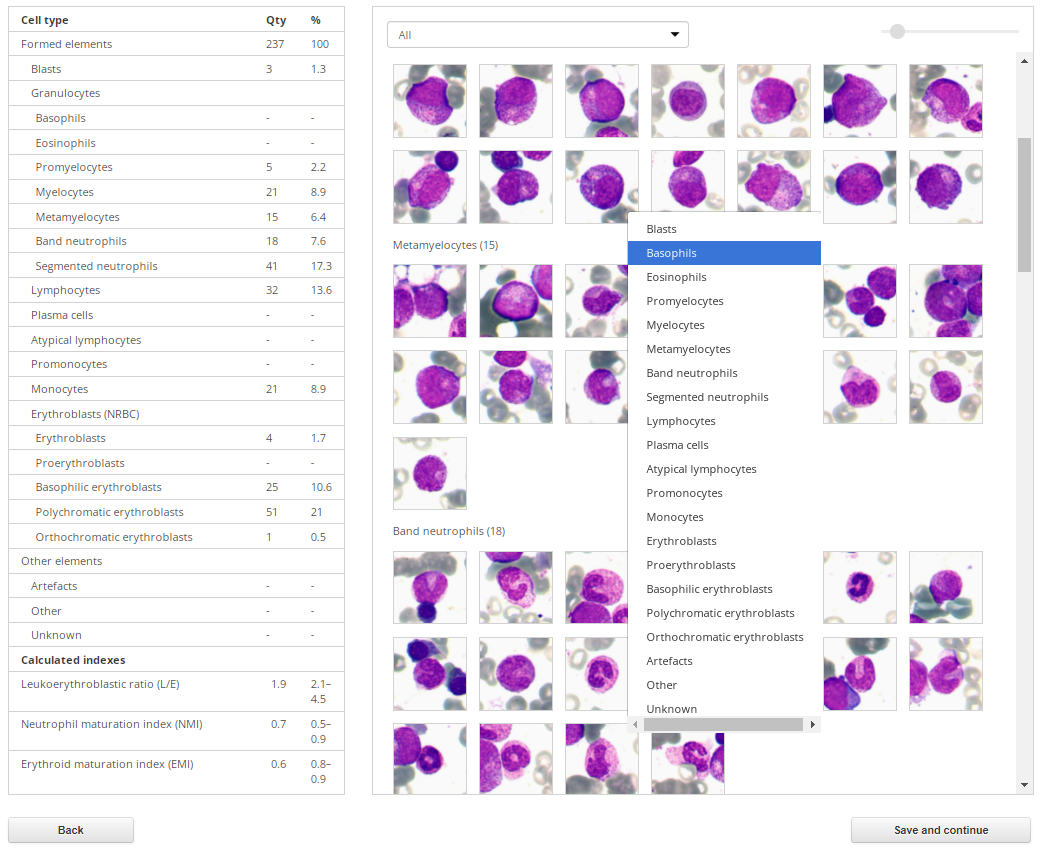
In addition to moving the image of the cell, you can select its type in the context menu. Right-click on the selected cell to summon its context menu, then select the desired type in it with the left mouse button.
To select a type for multiple cells, left-click on each cell image, they will be highlighted with blue frames. Then right-click on one of the selected cells to summon the context menu, and select the desired type in it using the left mouse button. To select all the cells in a group, click on its name.
Once finished with all the cells, click "Save and continue" in the lower right part of the screen. After saving, you will be automatically taken to the "Summary" tab.
"Summary" tab
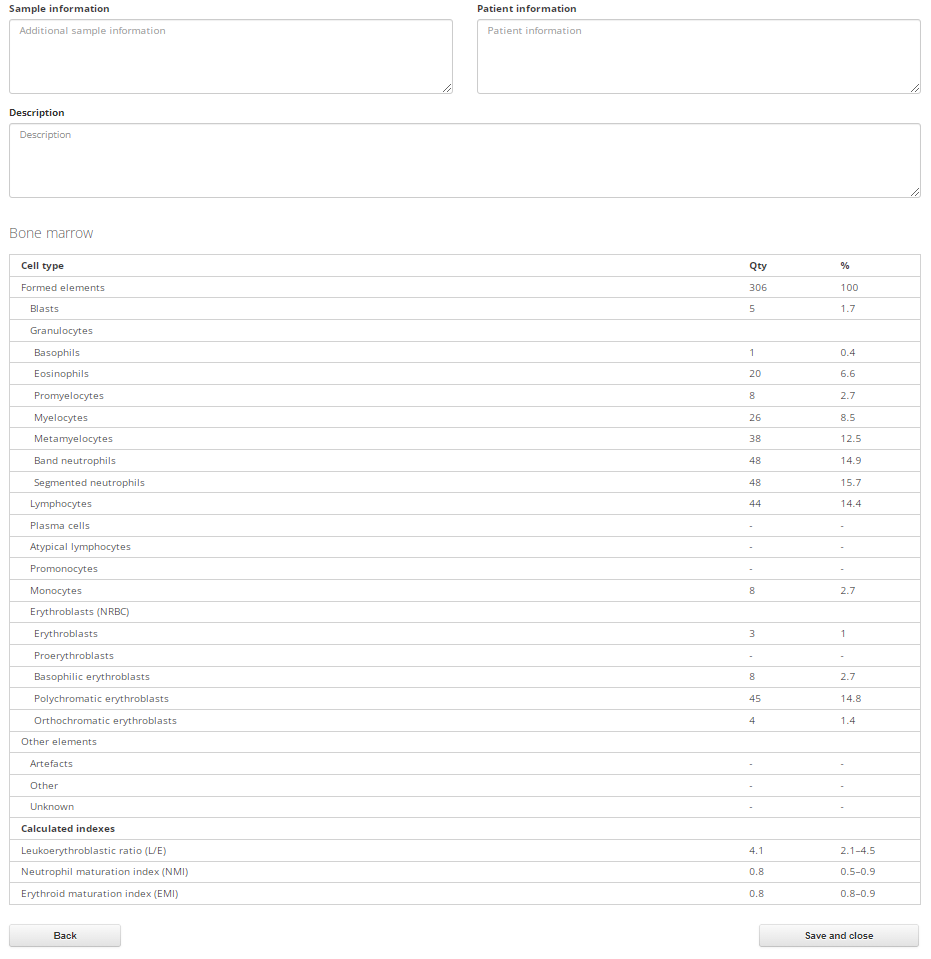
If necessary, add details to the summary in the “Description” field and fill in the "Sample Information" and "Patient Information" fields. To save the entered information, click "Save and close". To go to the "Cells" tab, click "Back"
The editing of the sample is complete, and the sample is ready to be included in a test.
Pap and Pap ICC samples validation
"Cells" tab
This tab allows you to view and change cell types.
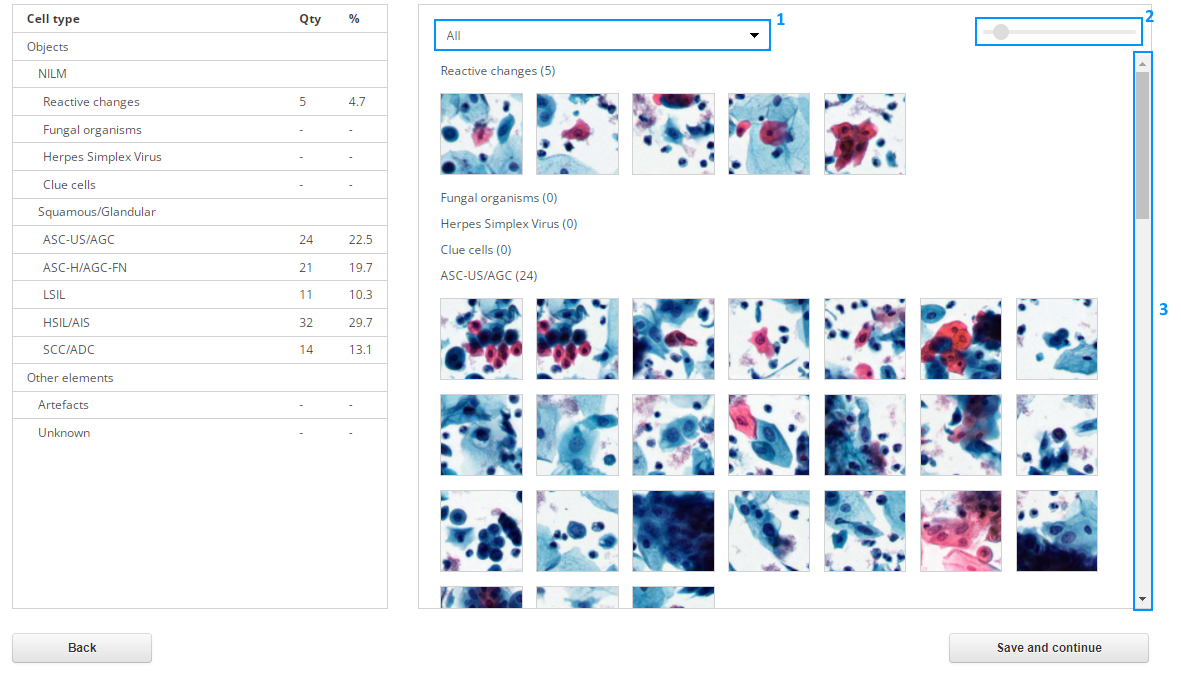
The "Cells" tab consists of two sections:
- Table of cell types;
- Gallery of cell images.
Initially all cells are displayed as unknown. You can select the type of cells to view in the drop-down list at the top of the gallery (1). In the upper right corner there is a tool for changing the zoom of cell images (2). Use the scroll bar (3) to view all the cells.
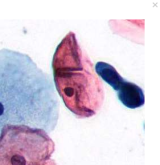
Left-click on a cell and press the "Space bar" on the keyboard to see a quick preview. To close the quick preview, press the "Space bar" again or click on the cross in the upper right corner of the pop-up window.
To delete a sample, left-click on it and press "Delete" on the keyboard.
Ways to work with the gallery:
Moving cells from the gallery to the table of types
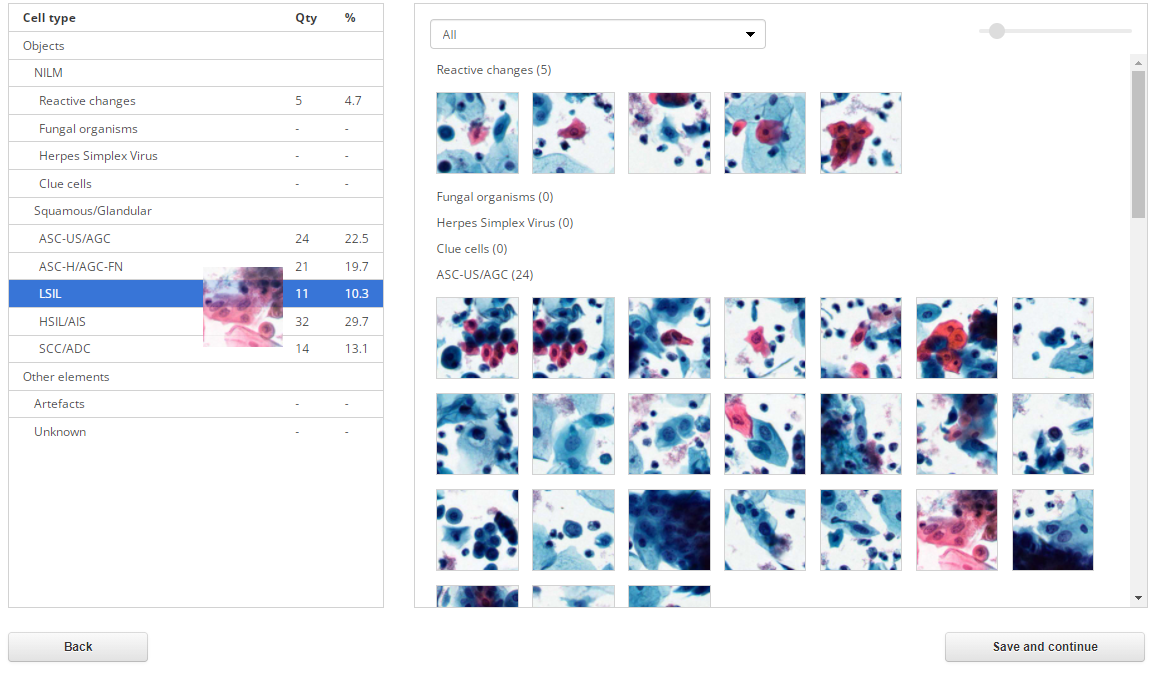
To move a single cell, hold down the left mouse button on the desired image and drag the cell to the table row with the name of the desired type (the background of the row will turn blue), then release the left mouse button. The number of cells of the selected type in the table will change.
To move multiple cells, left-click on each cell image, they will be highlighted with blue frames. To select all the cells in a group, click on its name. When the desired cells are selected, hold down the left mouse button on one of them and drag the cell to the table row with the name of the desired type (the background of the row will turn blue), then release the left mouse button.
Moving cells in the list with images
Select "All" in the drop-down list. All cell groups will be simultaneously displayed in the gallery. The number of cells of each type is indicated in bracket.
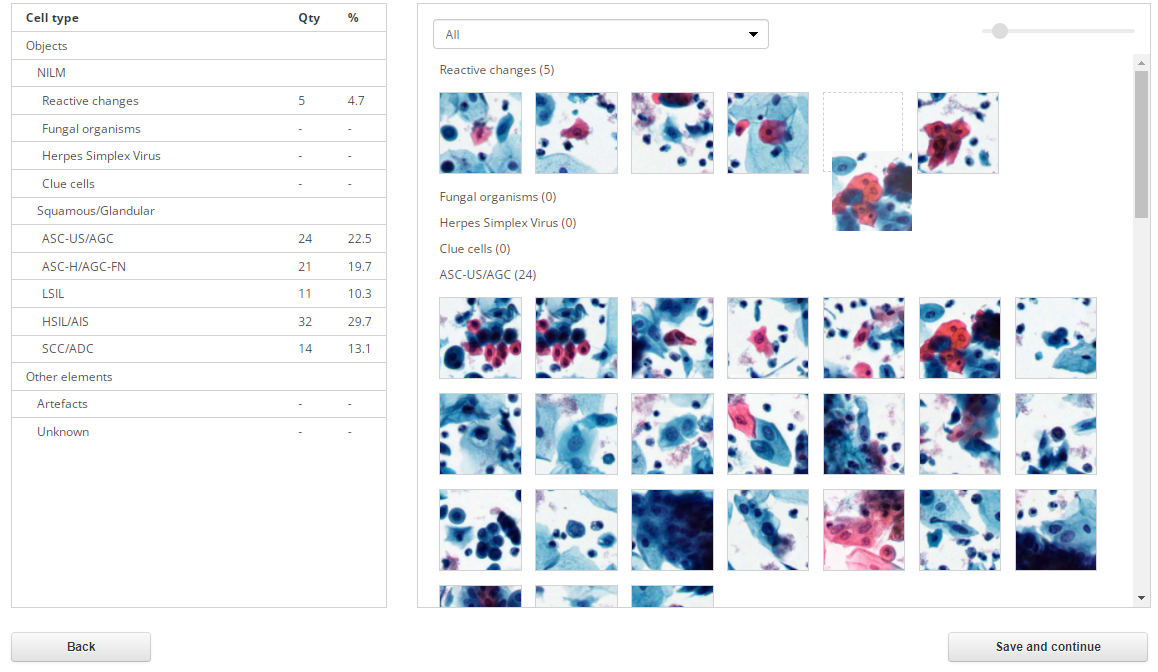
Select one or more cells. To select all the cells in a group, click on its name. Place the cursor on one of the selected cells. Hold down the left mouse button and drag the image of the cell up or down the gallery to transfer all the selected cells to another group. The placement field with a dotted border will indicate the place the selected cells will move to. If there are other cells in the group, then drag the cell/group of cells onto them until a placement field is displayed. Then release the left mouse button.
Selecting a cell type via the context menu
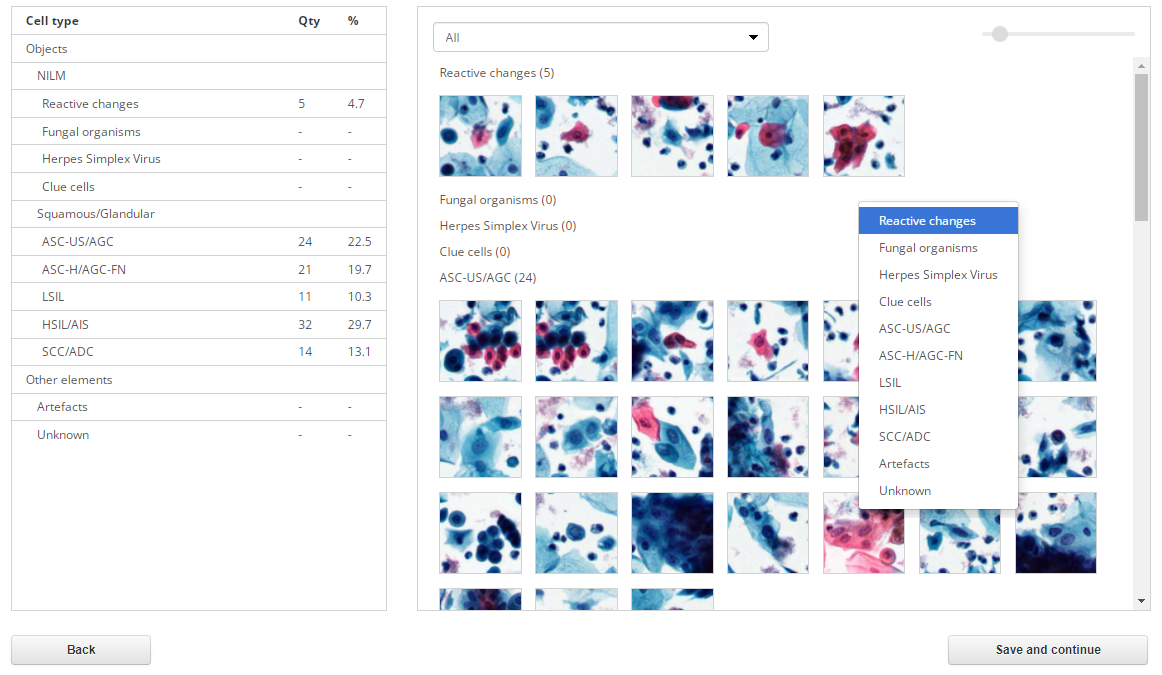
In addition to moving the image of the cell, you can select its type in the context menu. Right-click on the selected cell to summon its context menu, then select the desired type in it with the left mouse button.
To select a type for multiple cells, left-click on each cell image, they will be highlighted with blue frames. Then right-click on one of the selected cells to summon the context menu, and select the desired type in it using the left mouse button. To select all the cells in a group, click on its name.
Once finished with all the cells, click "Save and continue" in the lower right part of the screen. After saving, you will be automatically taken to the "Summary" tab.
"Summary" tab
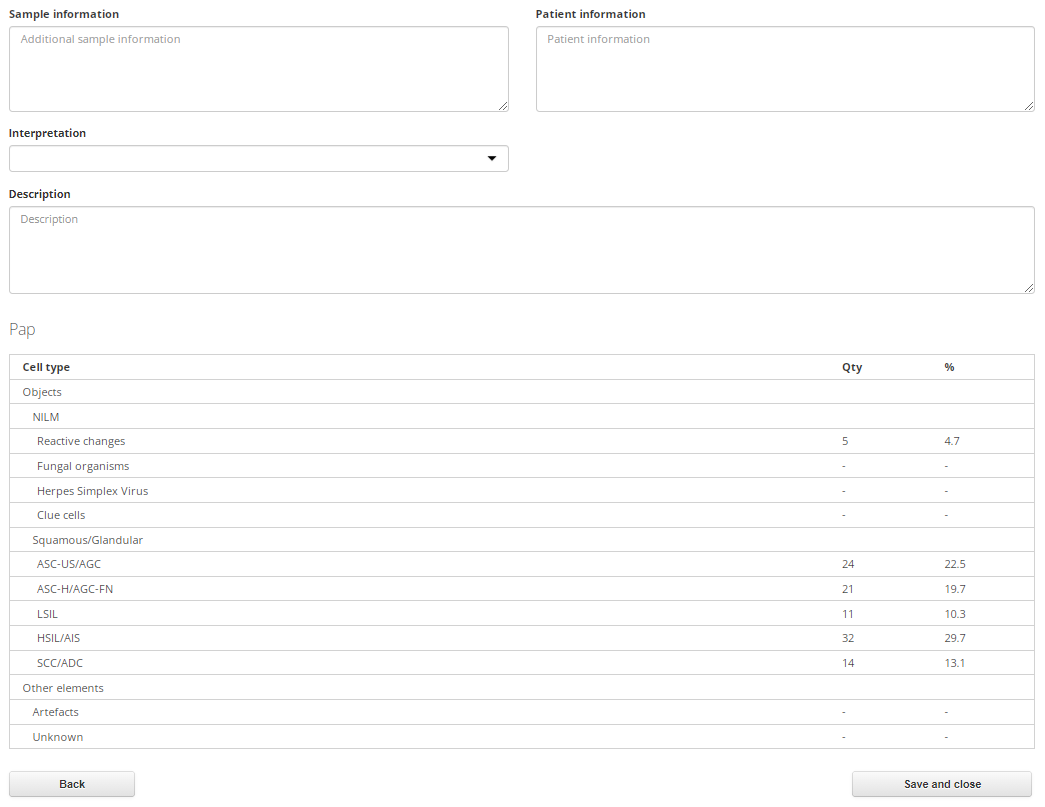
Enter data in the “Sample information” and “Patient information” fields. Select an interpretation in the drop-down list. If necessary, fill in the “Description” field. To save the entered information, click “Save and close”.
The editing of the sample is complete, and the sample is ready to be included in a test.
BF sample validation
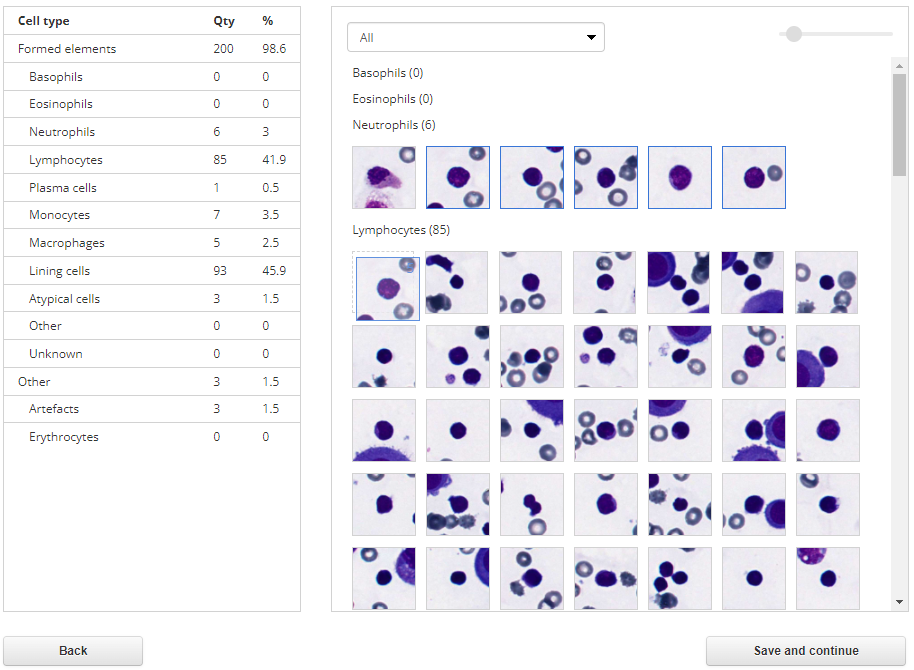
“Cells” tab
This tab allows you to view and change cell types.
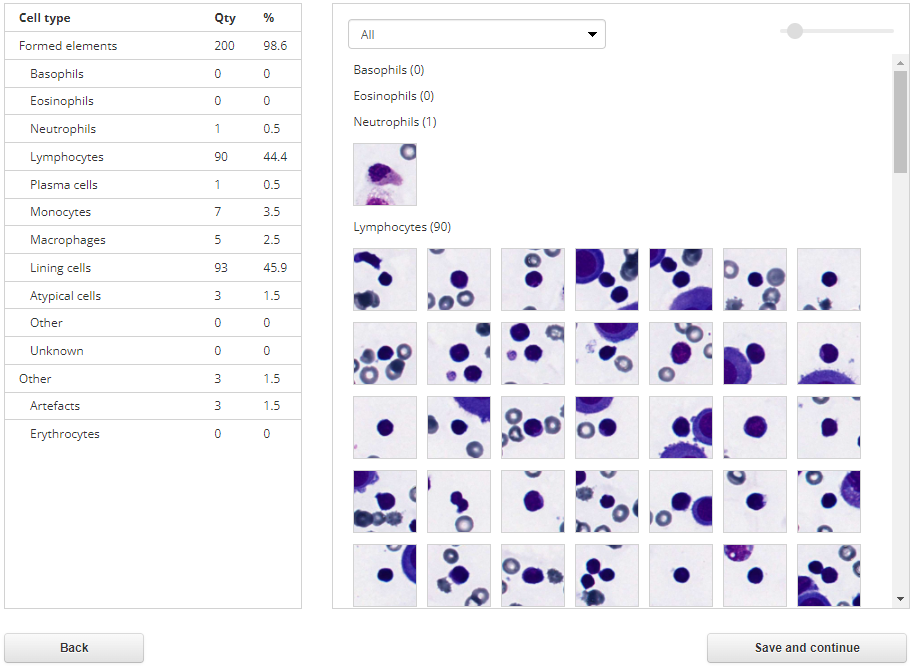
The "Cells" tab consists of two sections:
- Table of cell types;
- Gallery of cell images.
Initially all cells are displayed as unknown. You can select the type of cells to view in the drop-down list at the top of the gallery (1). In the upper right corner there is a tool for changing the zoom of cell images (2). Use the scroll bar (3) to view all the cells.
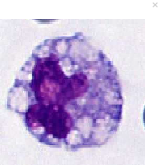
Left-click on a cell and press the "Space bar" on the keyboard to see a quick preview. To close the quick preview, press the "Space bar" again or click on the cross in the upper right corner of the pop-up window.
To delete a sample, left-click on it and press "Delete" on the keyboard.
Ways to work with the gallery:
Moving cells from the gallery to the table of types.

To move a single cell, hold down the left mouse button on the desired image and drag the cell to the table row with the name of the desired type (the background of the row will turn blue), then release the left mouse button. The number of cells of the selected type in the table will change.
To move multiple cells, left-click on each cell image, they will be highlighted with blue frames. To select all the cells in a group, click on its name. When the desired cells are selected, hold down the left mouse button on one of them and drag the cell to the table row with the name of the desired type (the background of the row will turn blue), then release the left mouse button.
Moving cells in the list with images
Select "All" in the drop-down list. All cell groups will be simultaneously displayed in the gallery. The number of cells of each type is indicated in brackets.
Select one or more cells. To select all the cells in a group, click on its name. Place the cursor on one of the selected cells. Hold down the left mouse button and drag the image of the cell up or down the gallery to transfer all the selected cells to another group. The placement field with a dotted border will indicate the place the selected cells will move to. If there are other cells in the group, then drag the cell/group of cells onto them until a placement field is displayed. Then release the left mouse button.
Selecting a cell type via the context menu

In addition to moving the image of the cell, you can select its type in the context menu. Right-click on the selected cell to summon its context menu, then select the desired type in it with the left mouse button.
To select a type for multiple cells, left-click on each cell image, they will be highlighted with blue frames. Then right-click on one of the selected cells to summon the context menu, and select the desired type in it using the left mouse button. To select all the cells in a group, click on its name.
Once finished with all the cells, click "Save and continue" in the lower right part of the screen. After saving, you will be automatically taken to the "Summary" tab.
"Summary" tab
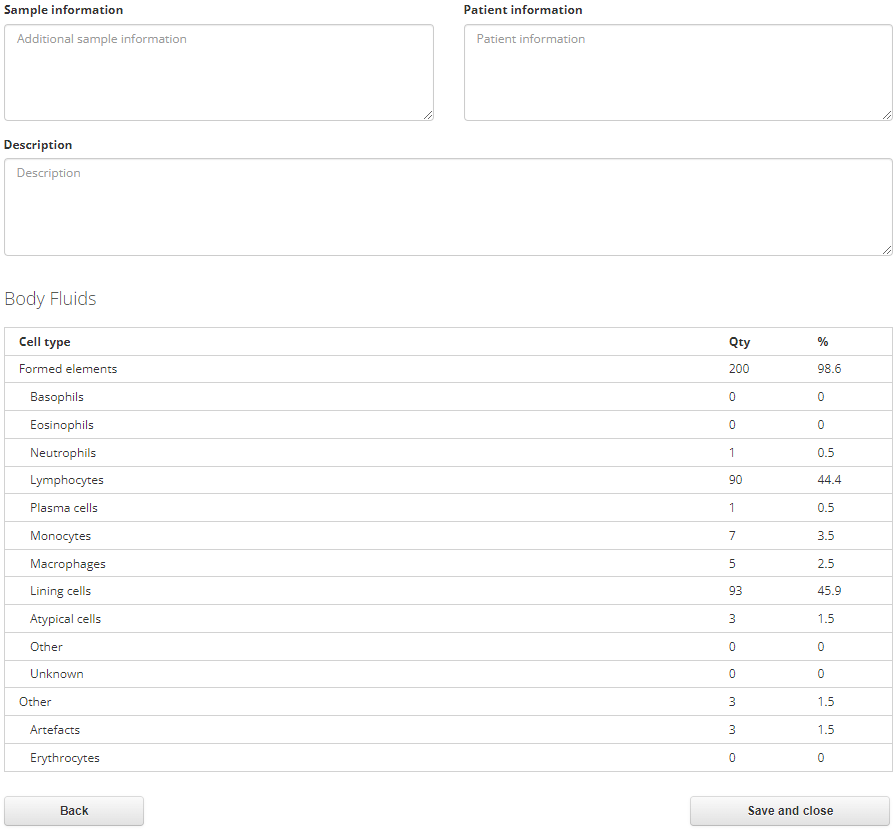
Enter data in the “Sample information” and “Patient information” fields. If necessary, fill in the «Description» field. To save the entered information, click "Save and close". To go to the "Cells" tab, click "Back".
The editing of the sample is complete, and the sample is ready to be included in a test.
Histo and Cyto samples validation
"Summary" tab
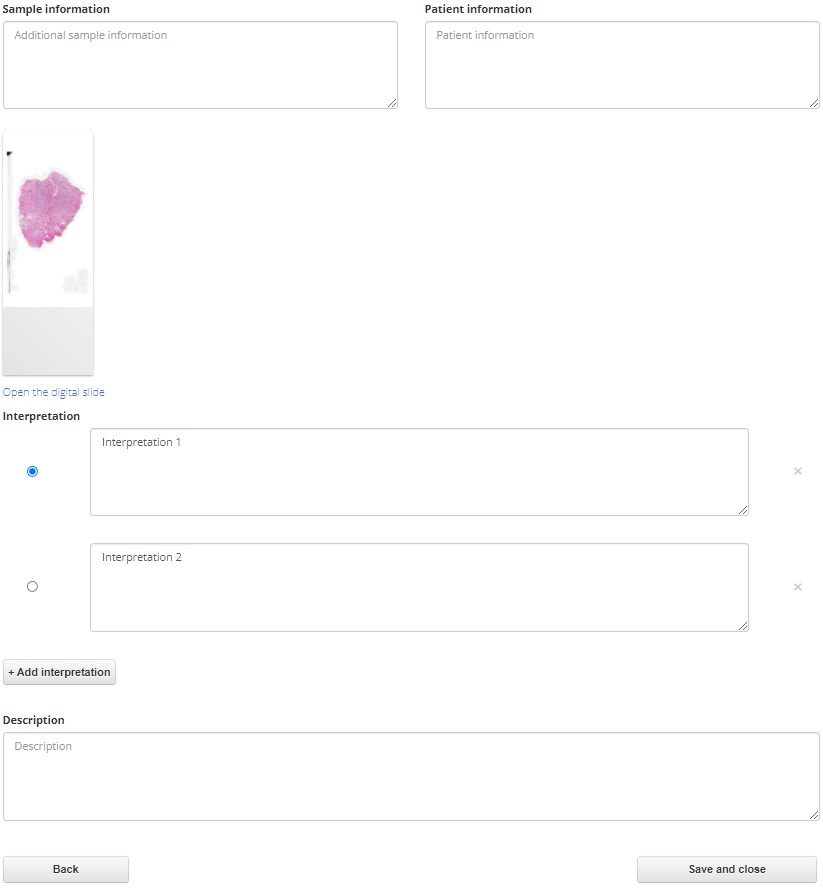
Enter data in the “Sample information” and “Patient information” fields. Add several interpretations using the “Add interpretation” button and set the radio button next to the correct answer. If necessary, add a description. To save the entered information, click "Save and close". To return to the sample list, click "Back".
The editing of the sample is complete, and the sample is ready to be included in a test.
STDs sample validation
“Summary” tab
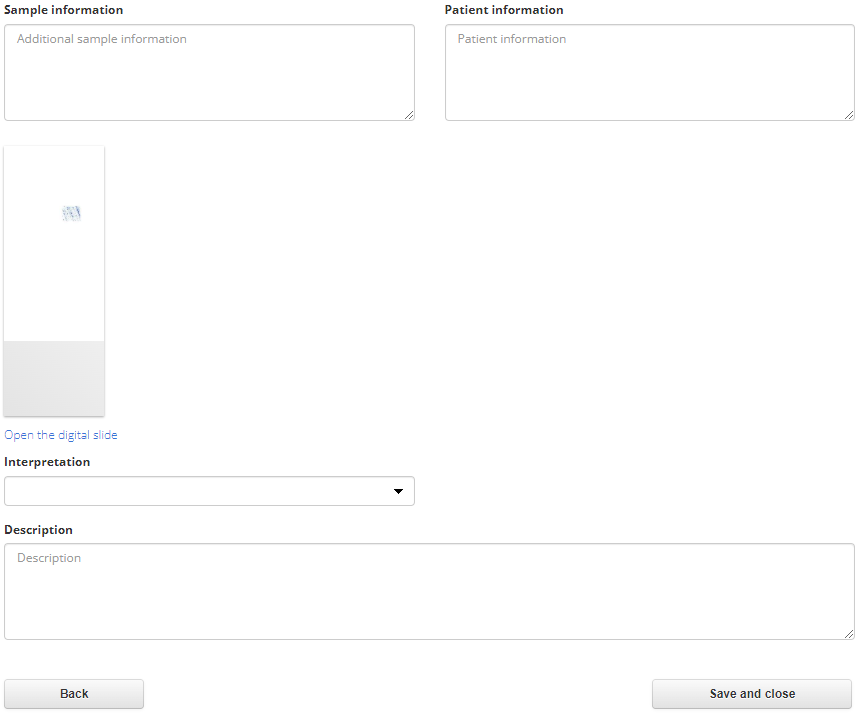
Enter data in the “Sample information” and “Patient information” fields. Select an interpretation using the “Interpretation” drop-down list. If necessary, add a description. To save the entered information, click «Save and close». To return to the sample list, click "Back".
The editing of the sample is complete, and the sample is ready to be included in a test.
Microbiology sample validation
“Summary” tab
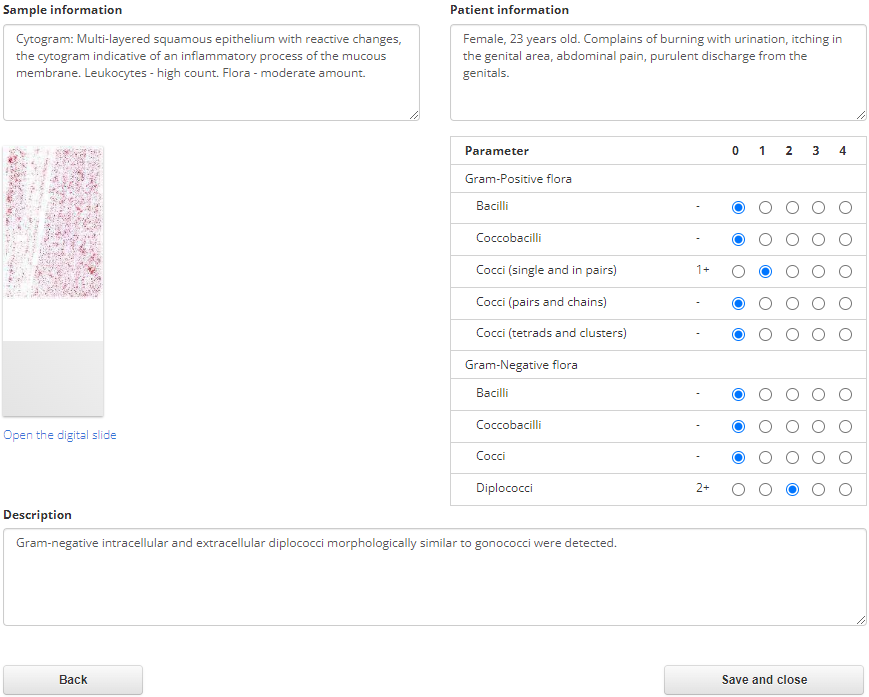
Enter data in the “Sample information” and “Patient information” fields. Set the required parameter values in the table using radio buttons in the corresponding columns. If necessary, add a description. To save the entered information, click “Save and close”. To return to the sample list, click "Back".
The editing of the sample is complete, and the sample is ready to be included in a test.