Creating a test
Click "Tests" in the menu on the left.

You will be taken to the "Test manager" page containing the table with created tests. Use the mouse wheel or the scroll bar to view all the tests.
To create a new test, enter a name in the "New test name" field.

After that, the "Create" button will become active, click on it to move on to the next page.
Selecting samples
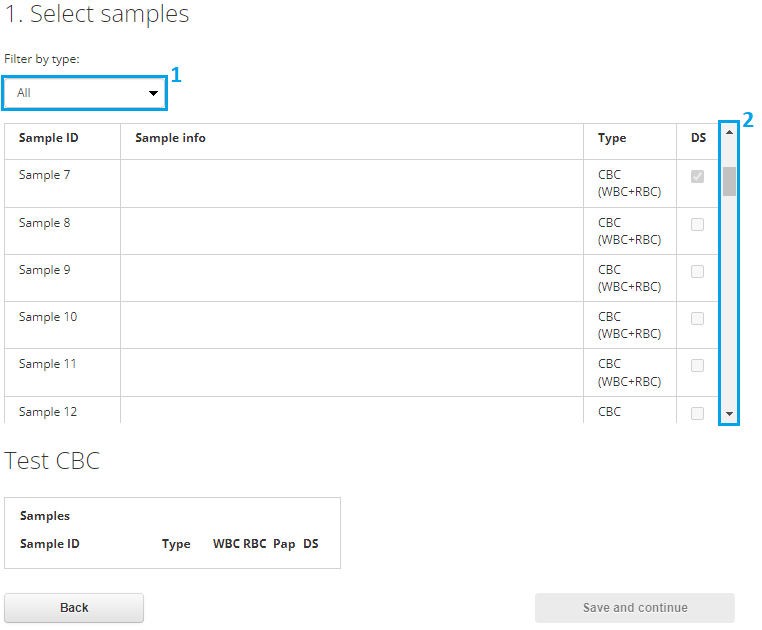
This page contains the table with available samples. To filter samples by type, use the drop-down list (1). To view the list of samples, use the scroll bar (2) or the mouse wheel. To add a sample to the new test, left-click in the row with the selected sample.

The selected samples will be added to the "Samples" panel. Use the checkboxes to edit the sample composition.
To delete the sample, click on the trash can icon to the right of its name. Click "Back" to return to the "Test manager". To proceed to the selection of test participants, click "Save and continue".
Selecting participants
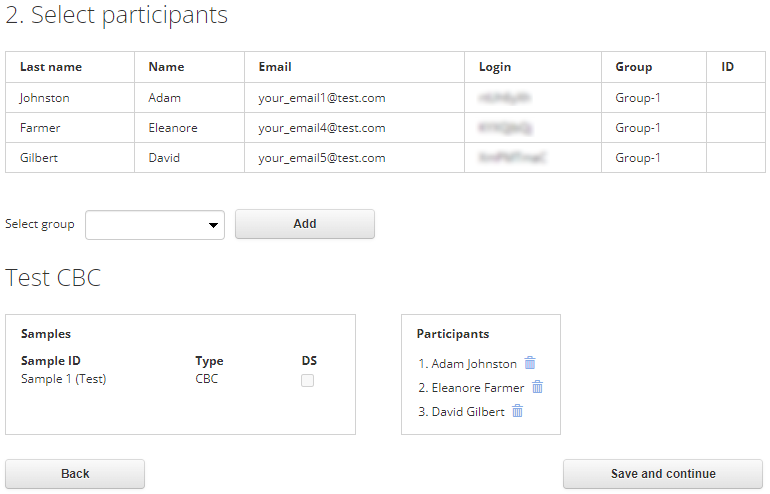
This page displays the table with participants, as well as the "Samples" and "Participants" panels. The "Samples" panel displays the samples added at the previous stage.
To select participants, click on the row with the desired participant, or select a group of participants in the "Select group" drop-down list, then click "Add". Click "Save and Continue" to proceed to "Test preferences". Click "Back" to return to the sample selection.
Setting up test preferences
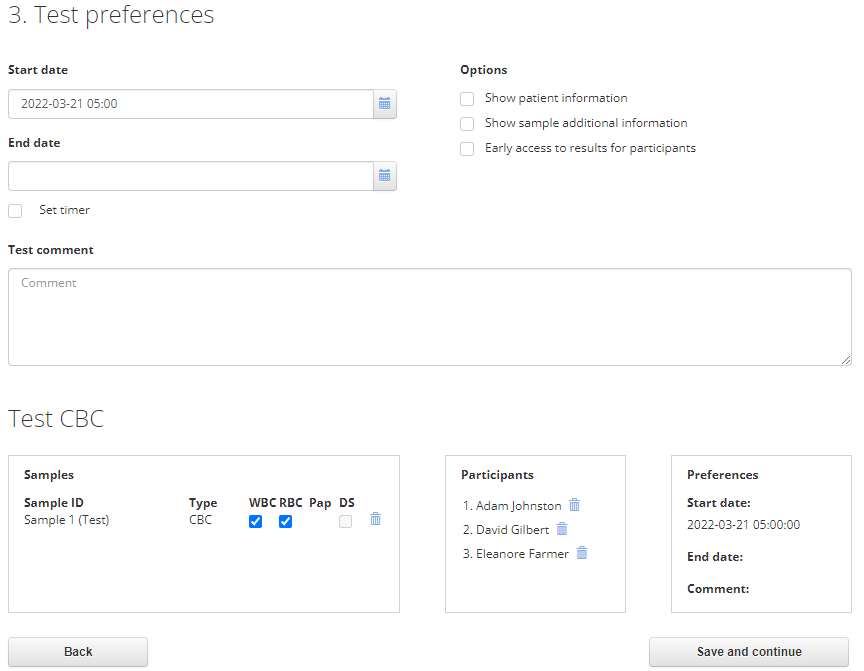
The fields with the start and end dates can be filled in using the keyboard in "YYYY-MM-DD HH:MM" format (e.g. 2021-10-15 12:30), and by setting dates in the calendar. To do the latter, click on the calendar icon on the right side of the date field and select the day and time.
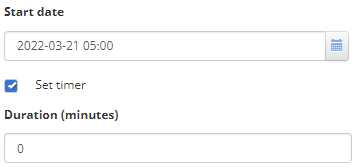
Checking the "Set timer" box changes the "End date" field to the "Duration" field, where you need to enter an integer value indicating the allotted time in minutes for completing the test.
Select the required options in the upper right corner by checking the corresponding boxes:
- "Show patient information";
- "Show additional sample information" — displays the data of the corresponding fields, if available, in the "Sample information" tab;
- "Early access to results for participants" — checking this box allows participants to view the results as soon as the test is completed, without waiting for the rest of the participants to complete the test.
If necessary, add a comment to the test. Click "Save and continue" to complete the test creation or "Back" to go to the participant selection page.

After saving the test preferences, a notification will appear and you will be taken to the test management page.
Viewing tests
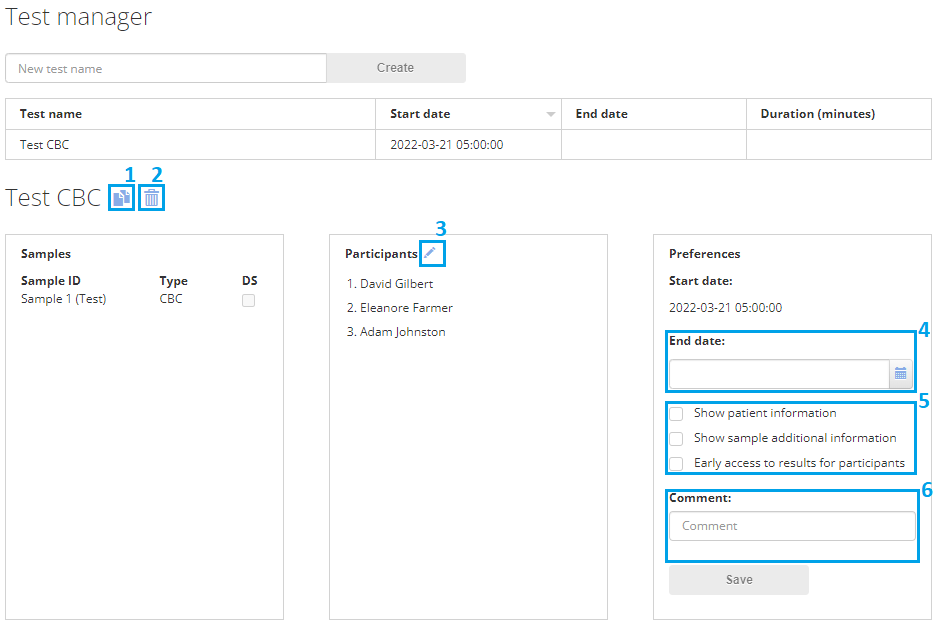
Left-click on the row with the required test. Three fields will appear:
- "Samples" — list of test samples;
- "Participants" — list of participants;
- "Preferences" — start and end dates or test duration, text comment.
If necessary, add participants by clicking on the pencil icon (3), change/delete the end date of testing (4), enable or disable additional options (5) by checking the boxes, change the comment (6). To delete the test, click on the trash bin can icon in the line with the name of the test (2) and confirm the action in the dialog box.

A notification will appear in the upper right corner.
To create a duplicate of the test, click on the copy icon (1).
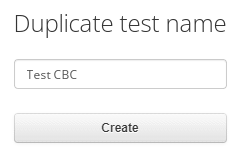
In the pop-up window, enter the name of the duplicate test and click "Create". Select samples and participants, set the test preferences and save. To cancel, click the cross in the upper right corner of the window.